Prerequisites:
- Photoshop (IF YOU DO NOT Have PHOTOSHOP, SCROLL DOWN to the bottom of the page and I will put the code to copy past and some instructions to get you started!)
- Some basic familiarity in working with images on Websites Specifically how to upload images to your webserver or photo sharing site (I highly recommend using your website for this).
- Basic Html knowledge if you went thru part 1 you should be good to start.
Ok so for step 2 Open up your Photoshop... I am using CS4... so things may look slightly different if you are using older versions of photoshop. But the layout is BASICALLY the same.
Make sure you have gone thru and read
Part 1 FIRST!!!
Ok so open up your photoshop.
Click New.
You need to set up your dimensions to be no bigger than about 750 across. Length wise you can add as many boxes as you would like but I'm going with this:

Click Ok.
Create your boxes. You want to keep them aligned vertically and horizontally. If you wanted to create boxes on one side and columns on the other that is fine play with this all you want.
But I just created some basic boxes for this excercise, like this:

You can find some great badges on the web just by searching around... or create your own using your images and text. (If I went into how to create custom images this would be A VERY long tutorial) you can find some great photoshop tutorials on creating images for websites just google it!!! you can drop pictures on these boxes which I created using the box tool. It's pretty simple once you start working with it. I tried doing this with a background but because of the way that facebook renders slices I ended up with lines where the slices were so for sanity's sake just keep your background white.
So once you have your boxes with images, text, badges whatever you like we are going to go to find the slice tool. I BELIEVE for most versions of photoshop it is grouped with the Crop tool... (Refer to google: where is the slice tool for CS3 if you are having trouble with finding it)
in my version I find it here:

A little backgound on the slice tool... this allows you to cut up a design for rendering with html and allowing you to create images that can be linked for use on websites... It's really simple and easy way to create the custom fanpage with out having to worry about positioning because you can basically lay this out exactly the way you want it.
Ok so you have your slice tool selected using this tool you will select your images. You will basically just draw a line around your boxes (works just like the box tool) You will notice something like this:

When you create slices... you will notice that it breaks your images into peices make sure you leave enough white around your images AND that you keep them aligned in a reasonable manner both vertically and horizontally.
MAKE SURE YOU MATCH UP YOUR SLICES AS IN THE PICTURE BELOW... THIS WILL TAKE SOME FANAGALING... IF YOU MESS UP JUST CLICK UNDO AND START OVER!!! IF YOU SERIOUSLY MESS UP GO TO VIEW ON THE MENU BAR AND CLICK CLEAR SLICES! For the purposes of this excercise we will be dividing the image into four quadrants (notice that once you create your first slice that the box directly beneath it is created so now we have 3 peices but we have four boxes that we want to link out.
To create the fourth quadrant line up your slice tool with the top right node of the first slice and create a box around your top right image.
You will end up with something like this:

Now we have four equal quadrants that we are going to link out in the next step.
Go to File
select Save for Web and Devices.
This will let you create not only your images BUT also an HTML file.
This is the screen you should see:

Now we're going to create some links... Double click your first image... Mine is the Twitter badge... a box will pop up that looks like this:

Step one Name the image.
Step 2: in the URL box add the url you want the image to link to
step 3: Target select blank
Step 4: Message put something here like Go to my blog or Follow Me
Step 5: Select ok
Should look something like this:

Repeat this step by double clicking each of your quadrants and filling in your link information for each image slice or box if you will...
When you have completed these Steps we need to save this so we can get the HTML and Images to use.
So click save.

Next we need to make sure that we will be saving both and the images and the HTML.

For the
SAVE AS FILE TYPE use the drop down to select HTML and Images.
Make sure you name your file something you'll be able to find easily The images will be saved to a file called images and the html file will be called whatever you typed into the box when you saved.
Save it to your desktop to make it easy to find.
This will save an HTML and an Image file folder with your four images.
Now we need to upload
JUST the four images to your web server or photo service.
In part one I told you that we would need to Upload your images to your website. I can't tell you how to go about this since everyone's website is different. You could use Flickr or a photo sharing site but they really don't like this. I use Microsoft office live for my website. I am going to gloss over this part a bit if you have questions specific to a web service contact me and I can help you figure it out.
I have an image folder on my website already (MOST DO have a spot for you to upload images to, that is usually an image folder the URL folder for my website is this:


http://shessocraftyartanddesign.com/Images/
This is very important to know the location for your images for this next step... if you are doing this using photobucket or any other site you will still need the url for the individual images to edit the html.Now we will Edit the code.
For the next step open up the notepad or other word processor tool if you want.
Next open the HTML file we created in photoshop by double clicking it, It should open in your web browser. In your browser menu bar click View then Page Source. Copy the HTML on the page there. (I am using firefox)
Paste it into the notepad.
We will need to remove everything ABOVE the Table Id tag at the beginning and everything below the table id tag at the end.

What you will be left with is this:

Here is a brief breakdown of what
THIS is.

There should be 4 image sources and 4 links. If you are not familiar with HTML this picture should break it down for you... (My 3rd image above IS NOT linked but yours should be!)
Next we will need to Replace the image tags with the url location of the images you uploaded where ever you see an img src tag:

Whew!
Still with me We're almost there.
Once you have done this we need to COPY this CODE and go BACK to Facebook and follow the steps in part one to add a Static FBML Box to your page.
Once you have the box open DROP IN THIS CODE. Name your Tab and click SAVE.
Next go back to the Page Manager for your fan page.
Click the pencil icon next to your Newly created FBML box (remember you renamed it).

Select Application Settings.

Where it says Tab, it should say Available... Click on Add to add a NEW tab to your page... you can also at this time REMOVE the Box option.
Okay so we've got the tab. Now how do we make this the default tab for our NEW visitors???
Here we Go.
On the Page Manager screen Navigate to Wall Settings.

Click the Pencil
.

Default View change this to the Name of your new tab and click save.
Give it a few minutes to update Logout of facebook and google your fan page... Your new landing page should come up. Test your links to make sure they work.
This is just a basic framework for what a fanpage can be. Play with it have fun and post links to those fanpages I wanna SEE! Um just don't clone my page and we'll be all good. With a little imagination anything is possible!!!
PS. There are much easier ways to do this I know but this is the simplest and least complicated for me to figure out how to do this without having to figure out how to position the images WITHOUT writing code from scratch... Facebook has some limitations and is a bit wonky, I tried this several different ways without any luck but this worked!!!
If you have any problems feel free to comment and I will get back to you!!!!!
FYI... I name my images curse words when I have been working on something for days and it is driving me crazy... This slightly did that hence the up at 3 am thing and the cursey words in the file names... I have to amuse myself somehow. :)
NO PHOTOSHOP??? Here is the code for the basic image layout... I have used which is for four boxes... if you know html you should be able to build off of this nicely.
Scroll above to the part where we modified the code you will still need to modify what I am providing here, but you will also have to modify the link portion as well.
This is the code I have used...
<table id="Table_01" width="750" height="600" border="0" cellpadding="0" cellspacing="0">

<tr>

 <td>

  <a href="link location" target="_blank"

   onmouseover="window.status='Shop The Fall Line';  return true;"

   onmouseout="window.status='';  return true;">

   <img src="image location url" width="426" height="311" border="0" alt=""></a></td>


 <td>

  <a href="link location" target="_blank"

   onmouseover="window.status='Follow Me';  return true;"

   onmouseout="window.status='';  return true;">

   <img src="image location url" width="324" height="311" border="0" alt=""></a></td>

</tr>

<tr>

 <td><a href="link location" target="_blank"

   onmouseover="window.status='Follow Me';  return true;"

   onmouseout="window.status='';  return true;">

   <img src="image location url" "width="426" height="289" alt=""></td>

 <td>

  <a href="link location" target="_self"

   onmouseover="window.status='Shop SSC';  return true;"

   onmouseout="window.status='';  return true;">

                                <img src="image location url" width="324" height="289" border="0" alt=""></a></td>

</tr>

</table>
Ok you will need to replace link url with your link destination... you will need to replace image location with with the url for your images! This will create the quadrant formation... If you want columns or anything more you will need to modify this code MANUALLY!
If this is beyond your grasp... I am thinking about adding this as a service (RE NOT EXPENSIVE) as I know not everybody can decipher this. Contact me if you need that kind of help and I can see what I can do. I Really just wanted to share this info to get it out there!
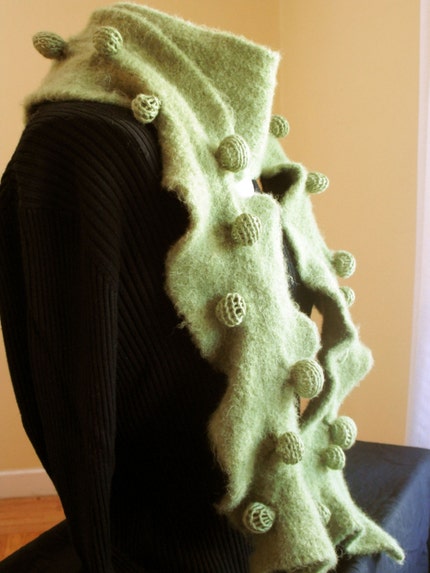
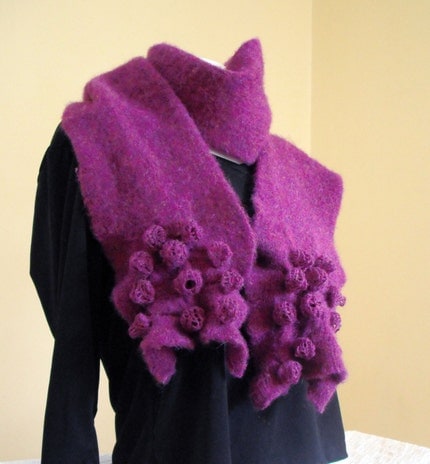
 For those of you not familiar with the wonderfulness of Wool Felt, let me go ahead and break it down as to why this is one of my FAVORITE mediums.










 http://shessocraftyartanddesign.com/Images/


